![SPRII-udenR_logo-orange+dark.png]](https://help.sprii.io/hs-fs/hubfs/SPRII-udenR_logo-orange+dark.png?height=40&name=SPRII-udenR_logo-orange+dark.png)
Connect Kustom Checkout, formerly Klarna Checkout, to your Sprii Page. Kustom supplies the checkout interface; the payment providers available through it handle their payment services. Klarna is one such provider, not the name of every payment offered through Kustom. This guide does not cover Klarna Payments, which Klarna offers separately.
Before you start
Use a Kustom Checkout merchant account and set up Sprii Checkout on the intended Page. Its storefront address must include the country. Use API credentials for the intended merchant ID.
If this Page already has a working integration, do not generate replacement keys solely because Klarna Checkout became Kustom Checkout. Kustom's migration guidance separates endpoint migration from credential replacement. There is no API-host field to edit in this Sprii form.
Set it up in Sprii
- On the intended Sprii Page, open Page settings
 > Sprii checkout > Payment methods
  . Find Kustom Checkout and click Configure.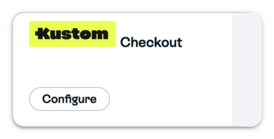
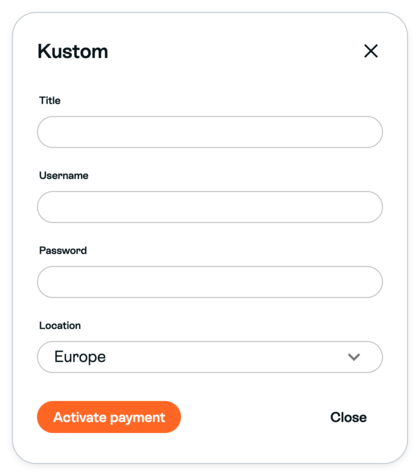
- If the form offers Activate payment, click it
 to enable the method for configuration. Then enter a customer-facing Title. The form's fields can already be visible before activation.
 - Keep the Sprii form open. Sign in to Kustom Portal for the merchant account you will use, then open Developers > API. If API is missing, ask your account administrator for the appropriate access or credentials.
If you need new credentials, choose Generate new. Store the displayed API key securely when it appears; Kustom does not let you retrieve that secret later. Keep the API username shown with that same key. See Kustom's API instructions.
Return to Sprii and enter the matching pair:- Username: the API username generated with your key.
- Password: that API key, not your Portal login password. This is Kustom's username/password client mapping.
- Keep a Location selected. Europe is the form's default; Europe, North America and Oceania all use the same Kustom API host. Testmode selects the test or live service. If Testmode is shown and checked, clear it for the live setup. In the ordinary Page administrator view, that checkbox is hidden when Testmode is off.
- Click Save
 . Reopen Configure and check the saved Title and Location. Saving settings does not prove that a customer's payment has been captured.
Capture fulfilled orders
This Sprii integration uses manual capture. Authorization, capture and payout are separate events. Moving an order to Completed does not capture its payment.
When fulfilling an authorized order, you can capture it in Kustom Portal: open Orders, find the matching order reference, open the order, and click Capture. Choose Capture by item, select only the items being fulfilled, then click Confirm. Check the order's Timeline for the capture. An authorization alone is not a captured payment or a payout.
This provider action does not establish that Sprii's displayed payment state has updated. Do not repeat a capture simply because a Sprii order stage is unchanged.
After a captured payment, use Refund orders through Sprii Checkout for a supported refund. A refund and a canceled uncaptured authorization are different operations.
Changing an existing setup
The payment method settings belong to the Page. Checkout loads and new payments use its current configuration, including for campaigns already created. Saving does not rewrite an already-issued provider payment link. However, capture and refund operations can still need the current account credentials, so changing them can disrupt work on older payments. Resolve that dependency before switching accounts or retiring a key.
Need help? Contact Sprii Support