![SPRII-udenR_logo-orange+dark.png]](https://help.sprii.io/hs-fs/hubfs/SPRII-udenR_logo-orange+dark.png?height=40&name=SPRII-udenR_logo-orange+dark.png)
Before you start
Homerunner is the provider name; Sprii still shows CoolRunner. The integration offers delivery options and labels for Sprii Checkout on the selected Page. Available delivery options depend on your Homerunner account.
You need administrator access to the Sprii Page, a Homerunner account and its three integration values: the values for API User, API Token and MyShop Token. The first two are used for label creation; MyShop Token is used to load delivery options. Keep the Page's average product weight realistic: CoolRunner's label weight uses that average multiplied by the item count, rather than each product's individual weight.
Set it up
- Select the intended Page. Open Page settings
 > Sprii checkout > Shipping
 . Find CoolRunner and click Configure.
- Click Activate shipping
- Enter a customer-facing Title for this shipping method.
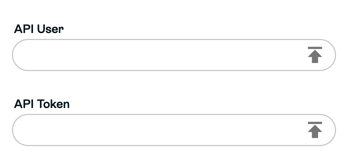
- Enter your CoolRunner/Homerunner account login in Sprii’s API User and its API token in API Token. In the CoolRunner account, find the token under Integrations > API Keys (Danish: Integrationer > API Nøgler); see nShift’s CoolRunner API token article. Newer Homerunner account guidance calls its integration area Settings > Integrations. Sprii checks this API User and API Token pair when you click Save and shows an error if the connection fails.
- In Homerunner, open the connected shop’s Webshop settings and copy the Token shown there. Enter that SmartCheckout shop token in Sprii’s MyShop Token. It is separate from the API token and a SmartCheckout shop ID; do not substitute either. If your Homerunner account does not show that Token, ask Homerunner for the SmartCheckout shop token for this webshop. Sprii requires a value at Save but does not check whether it loads delivery options until checkout.
- Review Printer if you use a label printer. Choose Capture payment when label is created
 only if label creation should request capture in Sprii. Creating a label does not prove capture succeeded.
- After entering the three values, click Save
 . Resolve any API User or API Token connection error shown. Saving the Page settings does not validate MyShop Token, prove delivery options will load, or confirm that a payment succeeded.
These settings belong to the selected Page. After changing them, check the shipping configuration for that Page and any existing campaign using Sprii Checkout. An already-created label is separate from the new configuration.
Before dispatching orders
A CoolRunner label can be created for an unpaid order, and a stored shipping package can move an order to Completed. Check the payment transaction before dispatching.
- The destination country currently comes from the Page's country. Inspect cross-border labels and resolve an incorrect destination before dispatching.
- Repeating label creation can create another shipment. Check for an existing label before retrying an uncertain result.
- If capture on label creation is enabled, check the resulting payment transaction before treating it as captured.
Need help? Contact Sprii Support